Sunday, May 26, 2013

Whole Wheat Apple Cinnamon Scones (Casein/Dairy Free)

I love it when recipes work out in my (our) favor. Took my favorite scone recipe and adjusted it to be casein (dairy protein) free, a little more wholesome made from 100% whole wheat pastry flour with apple for added yummy factor.  I doubled this recipe to get 1 scone pie to eat now and 1 to eat later. I put it in the freezer.


Ingredients
  • 1/4 cup light brown sugar
  • 2 cups whole wheat pastry flour
  • 2 teaspoons baking powder
  • 1/2 teaspoon baking soda
  • 1/4 teaspoon salt
  • 1 teaspoon ground cinnamon
  • 1/3 cup softened coconut oil (you can sub earth balance or smart balance too)
  • 1 apple, peeled and shredded (about 1 cup of apple shreds)
  • 1/3 cup Almond Milk (could sub any nut milk or coconut would work too)
  • 1 egg yolk (hold the whites for later) (for a no egg version leave out the egg and increase the nut milk to a 1/2 cup)
Instructions
  1. Preheat your oven to 425ºF and line a baking sheet with parchment paper.
  2. Place brown sugar in a large bowl. Whisk in the flour, baking powder, baking soda, salt, and cinnamon until everything is well-combined. Slightly warm the coconut oil so it's mildly soft and add it using a fork or pastry blender, cut it in until the mixture resembles coarse crumbs.
  3. Stir in the apple and almond milk, until the mixture starts to come together. It should be a little crumbly, but fairly easy to handle (not sticky) and easy to form into two balls. If it is too wet, add a little flour, too dry, sprinkle in some more milk alternative. Mine was more on the wet side and not so crumbly side but I've had it on all levels of the scale and it has cooked up just fine.
  4. Make into 1 or 2 balls. I made this into 1 larger ball and proceeded as follows: gently flatten them into a disk that are about an inch to an inch and a half high on a baking sheet. Sprinkle the scones with the tablespoon of sugar or even a little more if desire mixed with cinnamon.
  5. Cut or score the disks into 8 triangles (like a pizza), and bake for10-12  minutes, or until the scones begin to take on a nice golden brown hue on the tops and edges. I like to keep the scones touching as they bake for a pull-apart effect and tender middle. I gently separated them as they did slightly rise.
  6. Once out of the oven I let them cool for about 10 minutes. Then I poured icing all over the top. To make the icing just mix a tablespoon of almond milk with about 1 cup powdered sugar until you get the consistency you enjoy. It should be thick but pourable. Pour all over the top of the scones and let it harden slightly. 
  7. Enjoy!! (If you are freezing them, let them cool and then freeze. Step 6 should happen after you reheat on the spot so they don't end up soggy.)
Just out of the oven awaiting icing!

Monday, March 25, 2013

100% Sprouted Grain Bread Recipe #1


First I sprouted the following grains: wheat, barley, millet & spelt. Once all sprouted and combined they looked like this:


 Next I used my my champion juicer with the blank screen in to grind it to a pulp and activate the gluten.

I mixed about 1 TBSP. malted barley and 1TBSP yeast in my kitchen aid mixer with a touch of warm water to bubble for about 5 minutes. Then added the ground sprout mixture and used the mixer to bring it together. I put it in an oiled bowl to rise covered with plastic for about 2 hours. It rose a little. See note about skipping this rising step next time.

After the 2 hours I folded it over itself 2 times and rolled into a semi log shape gently and pressed it into the oil bread pan. Please not that this was a mistake. It should have gone directly into the loaf pans to rise and then bake.

 I baked it at 350 degrees for 40 minutes and this was not enough! I put it back in the oven at 275 degrees for 2 hours. This is how it looked before I put it back in for the second round of baking.
So it cooked up well, it was just a very dense little brick. I had to let it set up in the fridge for 2 days to get make it edible, otherwise it was too wet and gummy inside. I figured once I'm using wheat berries I might as well add some whole wheat flour next time and vital wheat gluten too. I don't like brick bread although it tasted delicious!

Whole Wheat Flax Buttermilk Pancakes

Makes a lot of pancakes - approx. 30 4inch pancakes
Ingredients
1 & 1/2 cup whole wheat flour
1 & 1/2 cup whole wheat pastry flour
6 tablespoons ground flax seeds
3teaspoon baking powder
1& 1/2 teaspoon baking soda
1 & 1/2 teaspoon salt
6 tablespoons raw or unbleached sugar
3 cup low fat buttermilk (or milk with vinegar to curdle it)
3 teaspoon vanilla extract
3 large eggs
3 tablespoons melted butter or oil

Instructions
1. Preheat griddle or fry pan to medium-high heat.
2. In a large bowl, whisk together both flours, flax seeds, baking powder, baking soda, salt, and sugar.
3. In a large measuring cup, measure buttermilk. Add in egg, applesauce, vanilla extract, and whisk to combine. Add to dry ingredients and mix just until combined and some lumps remain. Let batter rest for about 5 minutes.
4. Cook pancakes until there are a few bubbles on the surface and the edges are just cooked, about 2 minutes. Flip, and cook for about an additional 2 minutes or until cooked through.

This batter was a little on the thin side. I haven't had time to play with it to get thicker pancakes. I did add chocolate chips - because we love them, but this batter would definitely benefit from some oats, bananas or be delicious plain. My goal was to get away from white flours and sugars so my kids could eat a healthier whole grain food. Because I do not consider pancakes nutritious I wanted a way to remedy that, at least a little. ;)

Friday, February 1, 2013

Dairy Free, Sugar Free version of the Even More Perfect Wonderful Whole Wheat Fluffy Sandwich Bread

It is so fun to experiment with bread. I have had to cut sugars out of my diet, along with most dairy and gluten. I still eat some gluten but I replace it wherever I can. I make this loaf for the family and I'm working on a sprouted grain loaf of bread (recipe coming soon as it's a serious work in progress!). My hubby cut all dairy and casein out of his diet due to an allergy and I'm finally succumbing to the fact that sugar is bad, especially in the quantity that I enjoy adding it to my foods and baked goods! Yikes. So here is step one - removing dairy and sugar.

This loaf came out so silky smooth and still had some sweetness from the malted barley. What is malted barley and where do you find it? Well it was hard to find but I go it in the sugar section of my store next to all the alternative sweeteners. The product brand is NOW but I'm sure there are others out there. I have heard that Bob's Red Mill makes one too. It's fine and powdering like a flour/sugar. It is made from sprouting Barley, then drying it in a dehydrator at no higher than 170 degrees and then grinding it into a flour. By converting the grain to sprout it ends up really sweet and a great alternative to sugar, perfect for low GI diets and when replacing your sugars in your recipe you use about 1/4 the amount. I used even less.

Yield: 2 loaves
Ingredients:

2 tablespoons active dry yeast

2 cup warm water (110-115 degrees F)

2 tablespoons coconut milk (any milk alternative would work, I prefer coconut or nut milks)

2 Tablespoons Oil

1/4 Cup Malted Barley Sweetener

3 Tablespoons Flax meal

2 teaspoons salt

1 tablespoons Vital Wheat Gluten (Bob's Red Mill is what I used)

2 cups bread flour

1 3/4 cups whole wheat flour

Instructions:
1. Combine first 2 ingredients with a sprinkle of the malted barley and let proof for 5 minutes. I did this in the measuring cup so that I could put the next 3 ingredients in a large mixing bowl and stir while waiting for the proof. Once the yeast mixture bubbly and fluffy add it to the mixing bowl and stir.
Malted Barley and Yeast Fermenting

Milk, Oil and Malted Barley

2. Add bread flour, 1 cup whole wheat, vital wheat gluten, flax meal and salt. Mix until smooth and then add the last 3/4 cup whole wheat a 1/4 cup at a time and knead until dough is smooth and elastic, about 5 minutes.  I do this in my kitehenaid mixer. The dough should be pulled away from the sides of the bowl, the bowl pretty clean and not sticky to the touch. Grease a bowl with olive oil, pull dough out onto the counter and knead it into a ball checking consistency int he process. Then place dough in the greased bowl, turning once to grease top. Cover with a clean towel and let rise until doubled, about 40 minutes to 1.5 hours.It's winter in my house and the wood stove keeps things pretty warm so mine doubled in 40 minutes.


 3. Punch dough down; knead for a few minutes until smooth and then form into two loaves. Place in 2 greased loaf pans and cover. Let rise in a warm place until it is the size you would like your loaf to be once baked. It will not rise in the oven, maybe a little, so don't put it in the oven until you like how it looks. Turn the oven on now. Mine takes about 20-30 minutes to heat up and I like it warm and ready to pop the bread into as soon as I like it's size. Having to wait for the oven to heat at that point could cause the bread to fall while waiting and it might rise too much during the heating period. So like I said. Turn it on now.


(Above) Before the rise in the pans & (Below) Risen and just about to start baking.

4. Bake at 350 degrees for 30-35 minutes. If loaf starts browning too soon cover it with some foil. My loaves were perfect after 30 minutes. Very soft and tender but almost hard and hollow when knocked on.

5. Remove bread from oven and allow to rest in pan for a few minutes. This allows it to sweat a little and removes nicely from the pan and softens the crust. I like soft crust. I removed it to a wire rack to cool. I also put some plastic over the top to soften the top of the loaf. I take it off after about 10 mins. Slice and enjoy while still warm or wait until cooler so that your bread slices nicely! (click here for a little bread slicing tutorial) Leftover bread can be stored in an airtight bag or frozen until needed.


Now to figure out how to decrease the gluten content. Low GI Sprouted Grain bread here we come!

Update:
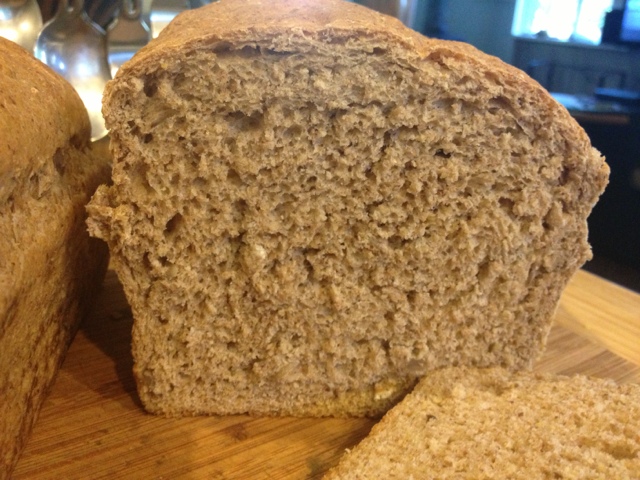
I adjusted the recipe to be a bit larger and have some oats and seeds. The additions are listed in the comments below and here are a couple pics. It came beautiful, soft and delicious. 


Friday, January 11, 2013

Crusty Bread - No knead

Easiest bread you will ever make and totally great for a first timer!


3 cups all-purpose or bread flour, more for dusting (or half WW and half bread flour, I have also used 100% whole wheat and it worked out nicely!)
1/2 teaspoon instant yeast
1 1/2 cups water
1¼ teaspoons salt
Cornmeal or wheat bran (optional)

Directions

1. In a large bowl combine flour, yeast and salt. Add 1 1/2 cups water, and stir until blended; dough will be shaggy and sticky. Cover bowl with plastic wrap. Let dough rest at least 12 hours, preferably about 18, at warm room temperature, about 70 degrees.

2. Dough is ready when its surface is dotted with bubbles. Lightly flour a work surface and place dough on it; sprinkle it with a little more flour and fold it over on itself once or twice. Cover loosely with plastic wrap and let rest about 15 minutes.

3. Using just enough flour to keep dough from sticking to work surface or to your fingers, gently and quickly shape dough into a ball. Generously coat a cotton towel (not terry cloth) with flour, wheat bran or cornmeal; put dough seam side down on towel and dust with more flour, bran or cornmeal. Cover with another cotton towel and let rise for about 2 hours. (I skipped the towel and did this in the bowel as it was much easier to transfer to the pot after with no sticking.) When it is ready, dough will be more than double in size and will not readily spring back when poked with a finger.

4. At least a half-hour before dough is ready, heat oven to 450 degrees. Put a 6 to 8-quart heavy covered pot (cast iron, enamel, Pyrex or ceramic) in oven as it heats. (I used a 4 quart as the 6-8 was way too big and I wanted a tall bread not low and flat. I also didn't preheat the pot because it's too tedious to get the dough into the hot pot.) When dough is ready, carefully remove pot from oven. Slide your hand under towel and turn dough over into pot, seam side up; it may look like a mess, but that is O.K. Shake pan once or twice if dough is unevenly distributed; it will straighten out as it bakes. Cover with lid and bake 30 minutes, then remove lid and bake another 15 to 30 minutes, until loaf is beautifully browned. Cool on a rack. Yield: One 1½-pound loaf.

Easy right? Granted it takes a bit of forethought and planning but the results are well worth the wait. We love this bread sliced thick with a bit of butter and liquid honey. It’s also great dipped in olive oil and balsamic vinegar as a pre-dinner treat…mmmmm.